
Oh, these little gems! Every time I make a batch of these, I’m instantly transported back to my grandmother’s kitchen during the holidays. She always had a tray of something sweet, and these Oreo Balls have that same magical, no-fuss deliciousness. They’re such a simple treat, but they disappear faster than anything else I bake. Seriously, if you need a quick, impressive dessert that everyone will adore, these are it!

Why You’ll Love These Oreo Balls
- They’re incredibly easy to make, even for total beginners!
- Just three ingredients for maximum deliciousness.
- That perfect creamy, crunchy texture in every bite.
- A fantastic make-ahead treat for parties, holidays, or just because!
Ingredients You’ll Need
- Regular Oreo cookies: You’ll want the classic sandwich cookies for this. No need for double-stuff or fancy flavors, unless you’re feeling adventurous after mastering the original!
- Brick-style cream cheese: Make sure it’s softened to room temperature. This is key for a smooth, lump-free mixture that blends beautifully with the cookie crumbs. Don’t use whipped cream cheese!
- Semi-sweet, milk, or white chocolate: The beauty here is you can pick your favorite! I usually go for semi-sweet, but milk chocolate is wonderfully decadent, and white chocolate makes them feel extra special. Chocolate chips, melting wafers, or chopped bars all work.
How to Make Oreo Balls Step by Step
First things first, let’s get our workspace ready. Grab a large baking sheet and line it with parchment paper. This will make handling our delicious little balls so much easier later on, and trust me, you’ll thank yourself for this step!
Next, we’re going to transform those Oreos into fine crumbs. Pop all 36 cookies into your blender or food processor. Pulse them until they’re super fine – think sand, not pebbles! Pour those beautiful crumbs into a big mixing bowl. Now, if you want to sprinkle some crumbs on top of your finished Oreo Balls, set aside a tablespoon or two right now. Then, add your softened cream cheese to the bowl with the crumbs. This is where the magic happens!
Using a handheld mixer, start mixing the cookie crumbs and cream cheese. Keep going until everything is fully combined and looks like a uniform, delicious dough. Don’t worry if it seems a little crumbly at first; it will come together. Make sure to scrape down the sides of the bowl a few times to get all those stray bits. Once it’s all mixed, measure out one-tablespoon portions and roll them into neat little balls. Place them on your prepared baking sheet and pop them into the freezer for at least 20 minutes to firm up. This step is crucial for easy dipping!
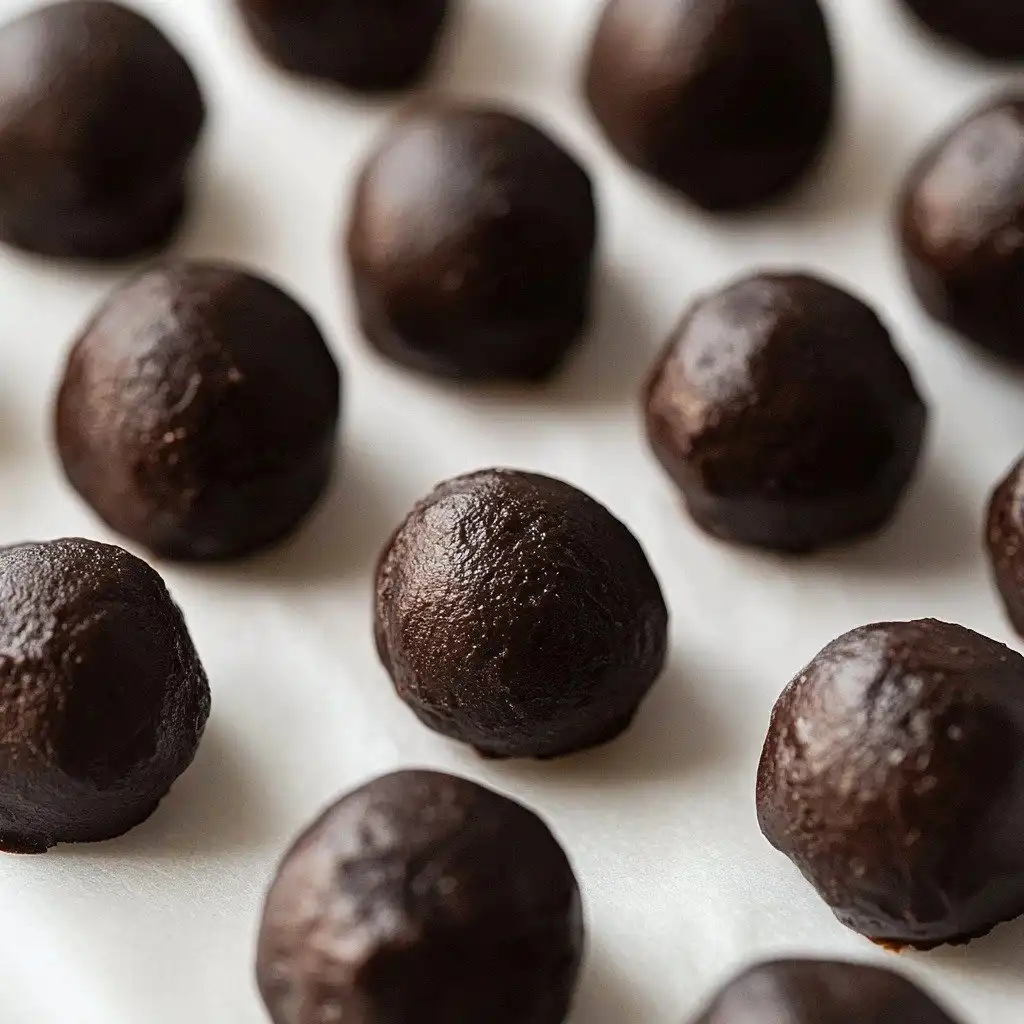
While your balls are chilling, it’s time to get the chocolate ready. Chop your chosen chocolate and put it in a microwave-safe bowl. Microwave it in short bursts – 20 to 30 seconds at a time – stirring really well after each one. You want it completely melted and smooth, without any lumps. Now for the fun part: dipping! Take your firm Oreo Balls from the freezer and dip each one into the melted chocolate, making sure it’s fully coated. Let any excess chocolate drip off, then carefully place them back on the parchment-lined baking sheet. If you saved some crumbs, sprinkle them on top of the coated balls right away, before the chocolate sets. Once all your Oreo Balls are dipped, pop them back into the refrigerator for at least 20 minutes, or until that chocolate coating is firm and shiny. Then, they’re ready to enjoy!
My Top Tips for Success
- I always make sure my cream cheese is truly at room temperature; it makes mixing so much smoother.
- In my experience, processing the Oreos until they’re super fine helps create a perfectly uniform texture.
- Trust me on this one: chilling the balls thoroughly before dipping is essential for preventing a chocolatey mess.
- When melting chocolate, go slow! Overheating can make it seize and become unusable.
- For easy dipping, use a fork or a candy dipping tool to lift and coat each ball.
- Work quickly when sprinkling crumbs, as the chocolate sets fast, especially on cold balls.
Common Mistakes to Avoid
- Not softening cream cheese enough: This will lead to lumpy balls. Make sure it’s truly at room temperature so it blends smoothly.
- Not chilling the balls before dipping: If the balls aren’t firm enough, they’ll fall apart in the warm chocolate. Freeze them for at least 20 minutes!
- Overheating the chocolate: Microwaving chocolate for too long at once will cause it to seize and become thick and clumpy. Use short intervals and stir well.
- Skipping the parchment paper: The balls will stick to the baking sheet, making them hard to remove cleanly.
- Not scraping the bowl: You might end up with unmixed cream cheese or crumbs. Always scrape down the sides of the bowl while mixing.
How to Store Oreo Balls
- Refrigerator: Up to 2 weeks in an airtight container.
- Freezer: Up to 2 months in an airtight container. Thaw in the refrigerator or at room temperature for a few minutes before serving.
Frequently Asked Questions
Can I use flavored Oreos?
Yes, absolutely! While the recipe uses regular Oreos, feel free to experiment with different flavored Oreos for a fun twist once you’ve tried the classic.
Do I need to refrigerate Oreo Balls?
Yes, because they contain cream cheese, Oreo Balls should be stored in the refrigerator to keep them fresh and firm.
What’s the best way to melt chocolate for dipping?
Microwaving in short 20-30 second bursts, stirring well after each, is generally the easiest method. You can also use a double boiler.
Can I make these ahead of time?
Definitely! Oreo Balls are a fantastic make-ahead dessert. You can prepare them several days in advance and store them in the refrigerator, or freeze them for longer storage.
I really hope you give these incredibly easy and delicious Oreo Balls a try! They’re such a crowd-pleaser and perfect for any occasion. If you make them, please let me know how they turn out – I’d love to hear about it!
PrintOreo Balls

These delightful no-bake Oreo Balls are made with just three simple ingredients for an irresistible creamy and crunchy treat.
- Prep Time: 25
- Total Time: 45
- Yield: 36 balls
- Category: Dessert
- Method: No-Bake
- Cuisine: American
- Diet: Vegetarian
Ingredients
- 36 regular Oreo cookies
- 1 (8-ounce) package brick-style cream cheese softened (226 grams)
- 16 ounces chocolate semi-sweet, milk, or white chocolate all work great (452 grams)
Instructions
- Line a large baking sheet with parchment paper.
- Add the Oreos to a blender or food processor.
- Process the Oreos until you have fine crumbs.
- Scoop the Oreo cookie crumbs into a large mixing bowl.
- Reserve 1 to 2 tablespoons of the crumbs to sprinkle on top of the Oreo balls if desired.
- Add the softened cream cheese to the Oreo cookie crumbs.
- Using a handheld mixer, mix the cookie crumbs and cream cheese together until fully combined.
- Stop to scrape down the sides of the bowl as needed.
- Measure out one-tablespoon sized portions of the mixture.
- Roll each portion into a ball.
- Place the rolled balls on the prepared baking sheet.
- Place the baking sheet with all of the Oreo balls in the freezer for at least 20 minutes.
- Chop the chocolate.
- Place the chopped chocolate in a microwave-safe bowl.
- Microwave the chocolate in 20 to 30 second increments.
- Stir well after each increment until the chocolate is fully melted and smooth.
- Dip the firm Oreo balls into the melted chocolate to fully coat them.
- Carefully place the coated balls back on the baking sheet.
- Sprinkle the reserved crumbs on top of the Oreo balls as you dip them.
- Once all of the Oreo balls are coated in chocolate, place them back in the refrigerator for at least 20 minutes.
- Refrigerate until the chocolate has hardened.
- Serve and enjoy!
Notes
Ensure cream cheese is at room temperature for easy mixing.
Thoroughly chill the balls in the freezer before dipping to prevent them from falling apart.
Melt chocolate slowly in short bursts to avoid seizing.
Work quickly when sprinkling reserved crumbs, as the chocolate sets fast.


