
There’s just something about banana pudding that brings me right back to childhood. That creamy sweetness, the soft wafers… pure comfort! But since going keto, I thought those days were behind me. Then, a little lightbulb went off, and after some kitchen magic (and a few delicious experiments!), I cracked the code. Now, I can enjoy all those nostalgic flavors without the sugar crash with this incredible Keto Banana Pudding Cheesecake. It’s a dream come true!
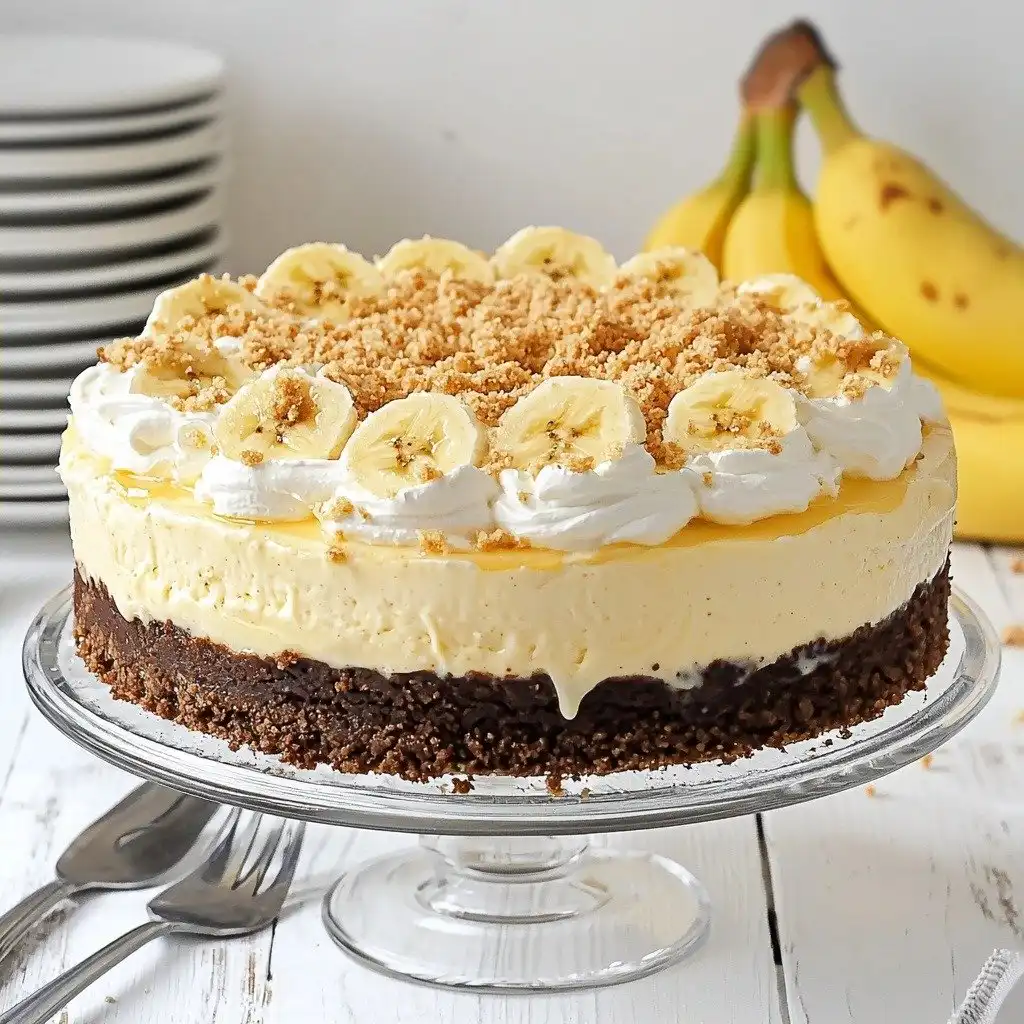
Why You’ll Love This Keto Banana Pudding Cheesecake
- It’s wonderfully creamy and smooth, just like a classic cheesecake should be.
- The banana flavor is spot on, thanks to that clever pudding mix.
- You won’t believe it’s sugar-free and keto-friendly – it tastes like the real deal!
- It’s a showstopper dessert that’s perfect for any gathering, big or small.
Ingredients You’ll Need
- Keto Vanilla Wafers: These are key for that classic banana pudding crust flavor. Look for brands specifically labeled “keto” or “sugar-free.”
- Keto Honey: This helps bind the crust together without adding sugar. It’s a great sticky sweetener alternative.
- Besti Monk Fruit and Allulose Powdered Sweetener: This is my go-to for keto baking. It has no aftertaste and dissolves beautifully, giving your cheesecake that perfect sweetness.
- Instant Sugar-Free Banana Pudding Mix: This is where the magic happens for that banana flavor! Make sure it’s instant and sugar-free.
- Wholesome Yum Coconut Flour: Just a tiny bit helps give the cheesecake structure. Don’t substitute with other flours here.
How to Make Keto Banana Pudding Cheesecake Step by Step
Let’s get baking! First, you’ll want to preheat your oven and get your springform pan ready. Line the bottom with parchment paper and give it a little spray with coconut oil. Then, wrap the outside of the pan tightly with foil. This is super important to keep water out when we do the water bath later.
Now for the crust! Grab those keto vanilla wafers and pulse them in your food processor until they’re fine crumbs. Add your keto honey and salt, then, with the processor running on low, slowly drizzle in the melted butter until it looks like wet sand. Press this mixture firmly into your prepared pan, going slightly up the sides. Bake it for just 10 minutes, then set it aside to cool while you make the creamy filling.
For the cheesecake, you’ll beat the softened cream cheese and powdered sweetener until it’s light and fluffy. Then, mix in the sour cream, heavy cream, and vanilla. This is where you add the banana pudding mix and coconut flour – mix until just combined. Finally, gently add the eggs, one at a time, mixing just until each is incorporated. Don’t overmix here, or your cheesecake might crack! Pour this dreamy filling over your cooled crust.
This is where the magic happens – the water bath! Place your springform pan into a larger baking pan, then carefully pour hot water into the larger pan until it’s about 1 inch deep. Bake for about an hour, or until the center just barely jiggles. Turn off the oven, crack the door, and let it cool slowly in there for another hour. This prevents cracking! After that, it’s fridge time for at least 6 hours, but overnight is always best for cheesecake.
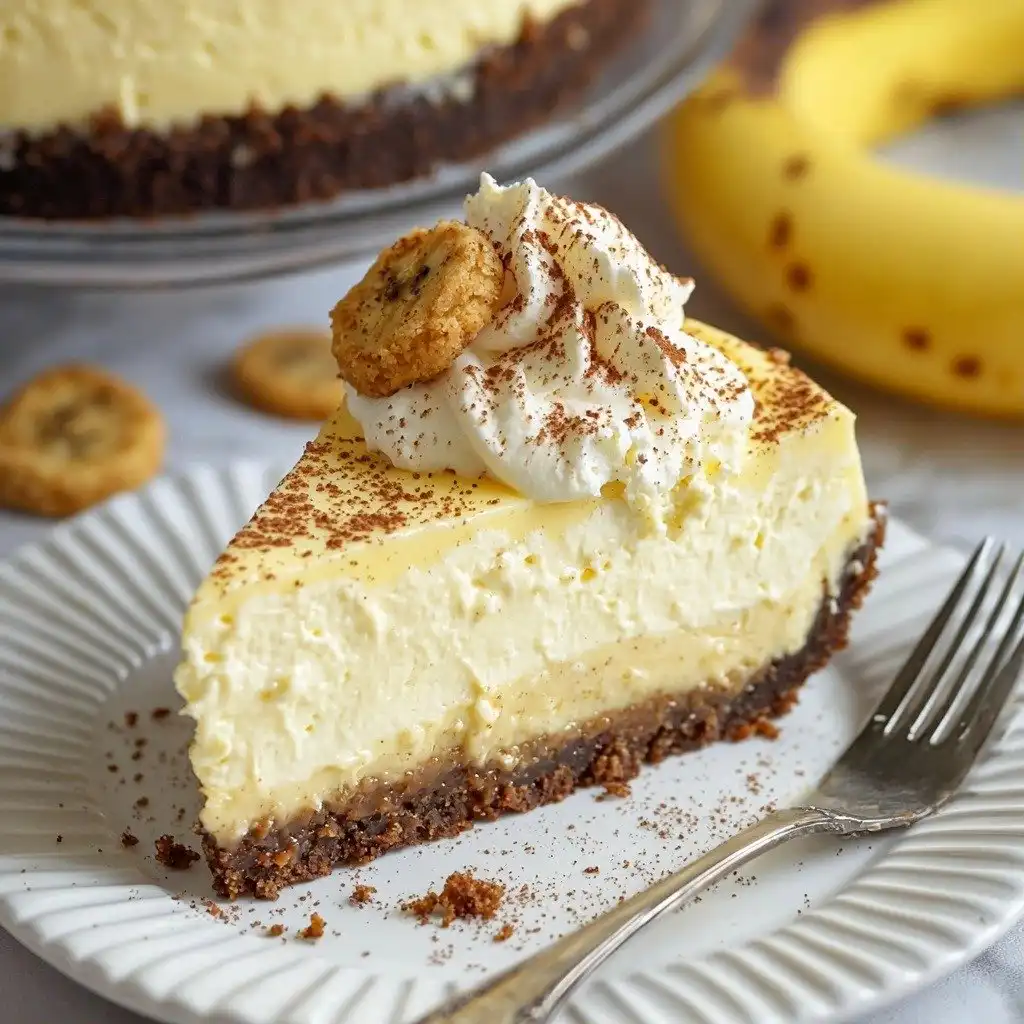
My Top Tips for Success
- I always make sure my cream cheese, sour cream, and eggs are at room temperature. It makes for the smoothest, creamiest batter.
- Trust me on this one: don’t skip the water bath! It helps the cheesecake bake evenly and prevents cracks.
- Do NOT overbeat the cheesecake batter, especially once the eggs are added. Overmixing can incorporate too much air, leading to cracks.
- Chilling is crucial. I know it’s hard to wait, but a well-chilled cheesecake is a happy cheesecake!
- For the crust, make sure those crumbs are really fine for the best texture.
Common Mistakes to Avoid
- Overmixing the batter: This can incorporate too much air, causing the cheesecake to puff up and then crack as it cools. Mix just until combined.
- Not chilling long enough: The cheesecake needs time to set properly. If you cut it too soon, it might be too soft and fall apart.
- Skipping the water bath: Without it, the edges can dry out and crack, and the center might not bake evenly.
- Not softening ingredients: Cold cream cheese and eggs will result in a lumpy batter. Always bring them to room temperature.
How to Store Keto Banana Pudding Cheesecake
- Refrigerator: Cover loosely with plastic wrap and store for up to 5 days.
- Freezer: For longer storage, wrap individual slices or the whole cheesecake (without garnish) tightly in plastic wrap, then in foil. Freeze for up to 1 month. Thaw in the refrigerator overnight.
Can I use a different sweetener?
I recommend sticking with the Besti Monk Fruit and Allulose Powdered Sweetener for the best results. Other sweeteners might have a different taste or texture. If you must substitute, use another powdered erythritol-based sweetener that measures cup-for-cup.
Why did my cheesecake crack?
Cracking is usually caused by overmixing the batter, baking at too high a temperature, or cooling too quickly. Follow the instructions for the water bath and slow cooling in the oven to prevent this.
Can I make this ahead of time?
Absolutely! This cheesecake is perfect for making ahead. In fact, it tastes even better the next day after the flavors have had a chance to meld. Just add the garnish right before serving.
Do I have to use coconut flour?
Yes, the coconut flour is important for the cheesecake’s structure and helps absorb moisture. It’s a very small amount and specifically chosen for this recipe, so I don’t recommend substituting it.
I hope this Keto Banana Pudding Cheesecake brings you as much joy and deliciousness as it does for me! It’s truly a special treat. If you make it, please let me know how it turns out – I love hearing from you!
PrintKeto Banana Pudding Cheesecake
A creamy, dreamy sugar-free cheesecake with all the nostalgic flavors of banana pudding, perfect for keto diets.
- Prep Time: 30
- Cook Time: 70
- Total Time: 460
- Yield: 12 servings
- Category: Dessert
- Method: Baking
- Cuisine: American
- Diet: Keto
Ingredients
- 5 (2.5-ounce packages) Keto Vanilla Wafers
- 12 (or more) Keto Vanilla Wafers for decoration
- 2 tbsp keto honey
- 1/2 tsp pink salt
- 6 tbsp unsalted butter melted
- 32 ounces (4 blocks) cream cheese softened to room temperature
- 1 cup Besti Monk Fruit and Allulose Powdered Sweetener
- 3/4 cup sour cream room temperature
- 1/2 cup heavy whipping cream room temperature
- 2 tsp real vanilla extract
- 1/4 cup instant sugar-free banana pudding mix
- 1 tbsp Wholesome Yum Coconut Flour
- 4 large eggs room temperature
- 1 cup heavy whipping cream cold
- 1/2 cup Besti Monk Fruit and Allulose Powdered Sweetener
- 2 tbsp instant sugar-free banana pudding mix
- 12 Keto Vanilla Wafers crushed
Instructions
- Preheat the oven to 350 degrees F.
- Cut a circle of parchment paper to cover the bottom of a 9-inch springform pan.
- Spray the pan with coconut oil.
- Wrap the pan with foil to prevent water from seeping into the pan.
- Place 5 packages of sugar-free vanilla wafers in the bowl of a food processor.
- Pulse until the cookies are a fine crumb, about 1 minute.
- Add the keto honey to the crumbs.
- Add the pink salt to the crumbs.
- Pulse to combine the honey and salt with the crumbs.
- With the food processor on low speed, slowly add the melted butter.
- Pulse just until the mixture resembles wet sand.
- Transfer the crust mixture to the springform pan.
- Press the crust mixture into an even layer on the bottom.
- Press the crust mixture slightly up the sides of the pan.
- Bake the crust for 10 minutes.
- Set the crust aside to cool.
- Place the softened cream cheese in the bowl of a stand mixer.
- Add the powdered sweetener to the cream cheese.
- Beat on medium-low speed until light and fluffy, about 1 minute.
- Add the heavy cream to the cream cheese mixture.
- Add the vanilla extract to the cream cheese mixture.
- Mix to combine, scraping down the sides of the bowl as needed.
- Add the banana pudding mix to the cream cheese mixture.
- Add the coconut flour to the cream cheese mixture.
- Mix to combine.
- With the mixer on low speed, add the eggs one at a time.
- Stop mixing as soon as the last egg is incorporated; do NOT overbeat.
- Pour the cheesecake mixture into the cooled crust.
- Smooth the top with a rubber spatula.
- Place the springform pan into a large baking pan or a roasting pan with tall sides.
- Add hot water to the baking pan until it is 1 inch deep.
- Bake for 55-60 minutes, or until the center just barely jiggles when gently shaken.
- Turn off the oven.
- Crack open the oven door, propping it open if needed.
- Allow the cheesecake to sit in the warm oven for 1 hour.
- Remove the pan from the water bath.
- Place the cheesecake in the fridge to chill for at least 6 hours, but preferably overnight.
- Add the cold heavy cream to the bowl of a stand mixer fitted with the whisk attachment.
- Add 1/2 cup powdered sweetener to the cream.
- Add 2 tbsp instant sugar-free banana pudding mix to the cream.
- Beat on medium speed until stiff peaks form, about 2 minutes.
- Gently run a knife around the perimeter of the cheesecake.
- Release the sides of the springform pan.
- Transfer the cheesecake to a serving platter.
- Spread the whipped cream on top of the cheesecake.
- Sprinkle with the crushed sugar-free vanilla wafers.
- Decorate with whole keto vanilla wafers.
Notes
Ensure all dairy and eggs are at room temperature for a smooth batter.
Do not overmix the cheesecake batter once eggs are added to prevent cracking.
Chill the cheesecake for at least 6 hours (preferably overnight) for the best set.
Use a water bath to ensure even baking and a creamy texture.


