
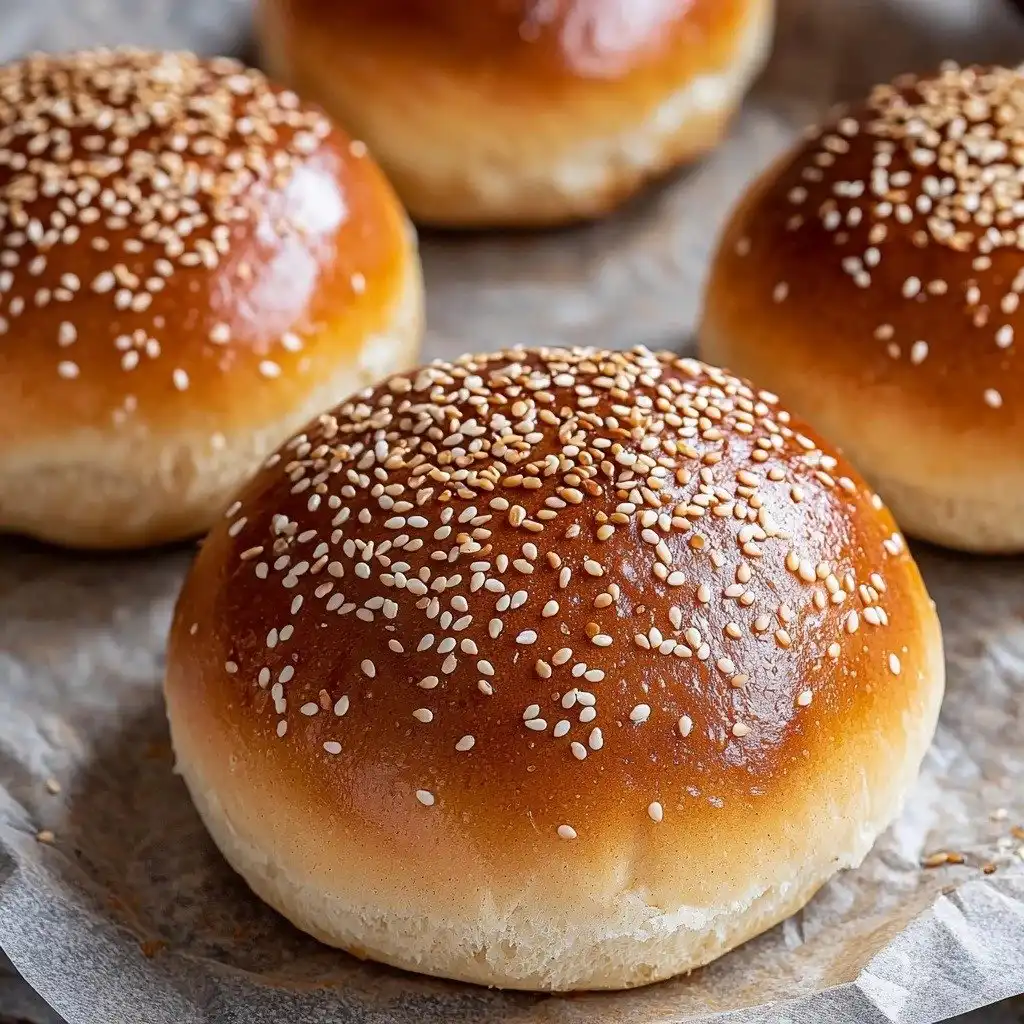
Oh, burger season! There’s nothing quite like gathering friends and family for a backyard BBQ, the smell of grilling patties filling the air. But for years, finding a truly delicious gluten-free bun was a real challenge. They were often dry, crumbly, or just… sad. That’s why I was determined to create a recipe for Gluten Free Burger Buns that tasted just as good, if not better, than their gluten-filled counterparts. And let me tell you, these fluffy, golden buns are a game-changer!
Why You’ll Love This Gluten Free Burger Buns
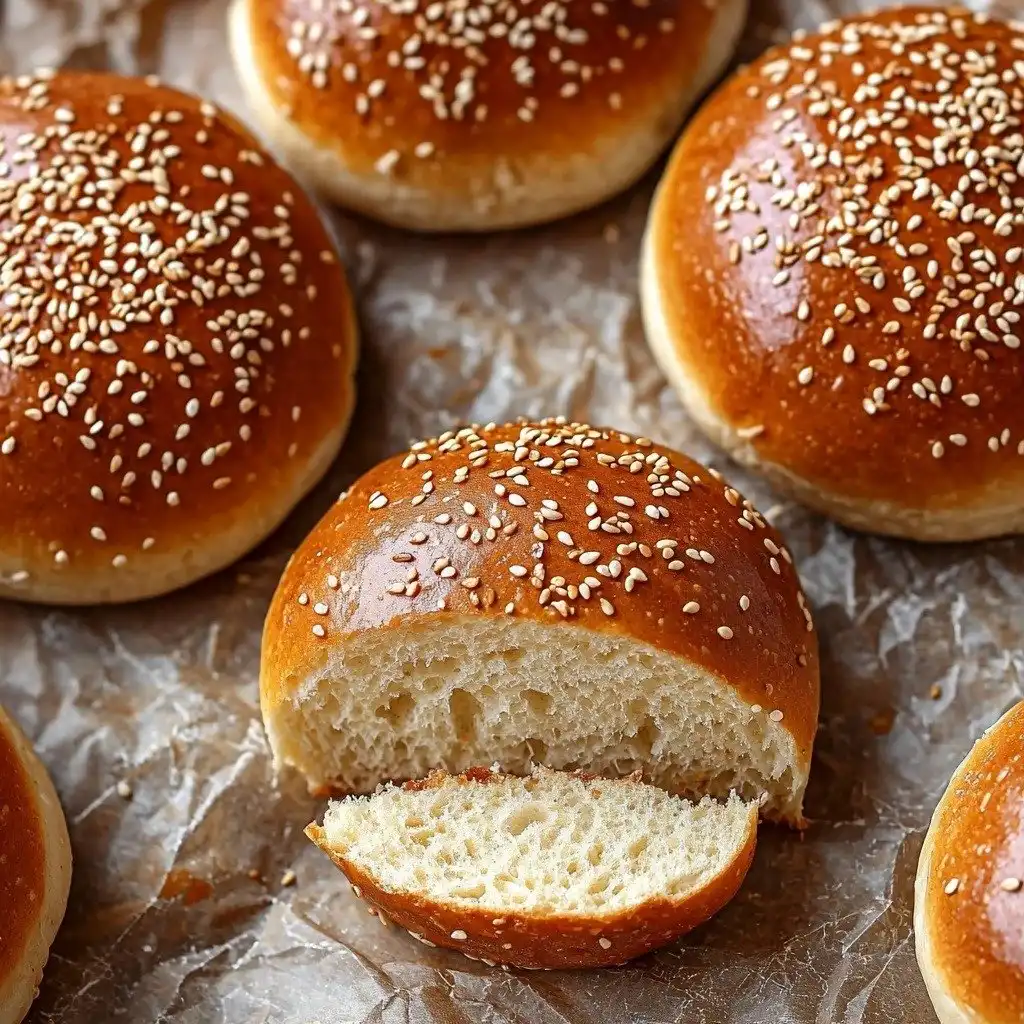
- They are incredibly soft and fluffy, not dense or dry at all.
- The flavor is wonderfully balanced, letting your burger shine through.
- They hold up perfectly to juicy burgers and all your favorite toppings.
- Making them from scratch is so rewarding and easier than you think!
Ingredients You’ll Need
- Whole Psyllium Husk: This is our secret weapon for structure and chewiness in gluten-free baking. If you only have psyllium husk powder, use a little less as it’s more concentrated.
- Tapioca Starch: Gives these buns a lovely light texture. You can swap it for cornstarch, potato starch, or arrowroot starch if needed.
- Millet Flour: Adds a subtle, nutty flavor and a tender crumb. Finely milled brown rice flour works well as an alternative.
- Sorghum Flour: Another fantastic gluten-free flour that contributes to the buns’ soft texture. Light buckwheat flour, white teff flour, or oat flour (if you tolerate oats) are good substitutes.
- Caster/Superfine or Granulated Sugar: Not just for sweetness, it also feeds the yeast and helps with browning.
- Instant Yeast: This makes the buns rise beautifully. If you’re using active dry yeast, you’ll need to activate it first with warm milk and a bit of sugar.
- Baking Powder: Works with the yeast to give an extra lift and tenderness.
- Xanthan Gum: Essential for gluten-free baking, it mimics the elasticity of gluten. Don’t skip it!
- Whole Milk: Adds richness and helps create a soft crumb. Make sure it’s lukewarm for the yeast.
- Eggs: Provide structure, richness, and help with browning. Use large eggs at room temperature.
- Sunflower Oil: Keeps the buns moist and tender. Any neutral-tasting oil will work.
- Egg Wash & Sesame Seeds: For that beautiful golden crust and classic burger bun look!
How to Make Gluten Free Burger Buns Step by Step
First things first, we’re going to create something called a psyllium gel. Just mix your psyllium husk with lukewarm water in a bowl. It sounds fancy, but in about 30-45 seconds, it will magically turn into a thick gel. This gel is super important for giving our gluten-free dough structure!
Next, grab a large bowl or your stand mixer. Whisk together all your dry ingredients: the tapioca starch, millet flour, sorghum flour, sugar, yeast, baking powder, and salt. Make sure everything is well combined. Then, add the milk, eggs, and oil to your psyllium gel and mix them all together. Now, make a little well in the center of your dry ingredients and pour in that wet psyllium-egg mixture.
This is where the magic happens! Knead the dough until it’s smooth and everything is incorporated. If you’re using a stand mixer, let it go for 4-5 minutes. If you’re kneading by hand, aim for 6-8 minutes. Don’t worry if the dough feels very soft and sticky – that’s completely normal for gluten-free dough! Just be sure to scrape down the sides of the bowl often to get all those dry bits mixed in. We want this dough to be extra smooth for the best buns.
My Top Tips for Success
- I always recommend using a stand mixer for this dough; it’s quite sticky and the mixer makes it so much easier.
- Trust me on this one: don’t add extra flour to the dough itself, even if it feels sticky. You’ll just end up with dry buns.
- I find that generously flouring your work surface and hands is key when you’re shaping these buns.
- For a perfect rise, create a warm, humid environment for proofing. My trick is a cup of hot water in a turned-off oven!
- In my experience, placing the baking sheet directly onto a hot baking steel or stone in the oven gives the buns an amazing boost and a super airy crumb.
Common Mistakes to Avoid
- Adding too much flour: This is a big one! The dough is naturally soft and sticky. Adding more flour will make your buns dense and dry. Stick to flouring your hands and surface, not the dough.
- Not kneading enough: Gluten-free dough still benefits from a good knead to develop structure. Skimping on this step can lead to crumbly buns. Knead for the full recommended time!
- Not letting the psyllium gel form: The psyllium needs time to absorb the water and create that gel. If you rush it, your dough won’t have the right texture.
- Proofing in a cold spot: Yeast loves warmth! If your kitchen is chilly, your buns won’t rise properly. Find a warm spot or use the oven trick.
- Overcrowding the baking sheet: Your buns need space to grow! If they’re too close, they’ll bake together and lose their round shape.
How to Store Gluten Free Burger Buns
- Room Temperature: Store in an airtight container for up to 2-3 days.
- Freezer: Once completely cooled, place in a freezer-safe bag or container and freeze for up to 2-3 months. Thaw at room temperature or warm gently in the oven or microwave.
Frequently Asked Questions
Are these buns really soft?
Yes, absolutely! The combination of flours and psyllium husk creates an incredibly soft and fluffy texture, unlike many dense gluten-free breads.
Can I make these ahead of time?
You can certainly bake these buns a day or two in advance. They also freeze beautifully, so you can always have some on hand!
What if I don’t have a stand mixer?
While a stand mixer is recommended because the dough is sticky, you can knead it by hand. Just be prepared for a slightly longer kneading time and make sure your hands are well-floured!
Can I substitute the sugar?
The sugar is important for feeding the yeast and for browning. While you could reduce it slightly, I wouldn’t recommend omitting it entirely.
I really hope these Gluten Free Burger Buns become a staple in your kitchen, just like they have in mine! There’s nothing quite like biting into a perfectly soft, homemade bun with your favorite burger. Give them a try and let me know how they turn out – I can’t wait to hear!
PrintGluten Free Burger Buns

Fluffy, golden, and perfectly soft, these homemade gluten-free burger buns are a game-changer for your next barbecue.
- Prep Time: 30
- Cook Time: 15
- Total Time: 135
- Yield: 8 buns
- Category: Baking
- Method: Baking
- Cuisine: American
- Diet: Gluten-Free
Ingredients
- 20 g (4 tbsp) whole psyllium husk
- 280 g (1 cup + 2½ tbsp) lukewarm water
- 230 g (2 cups) tapioca starch
- 135 g (1 cup) millet flour
- 60 g (⅓ cup + 2 tbsp) sorghum flour
- 50 g (¼ cup) caster/superfine or granulated sugar
- 8 g (2½ tsp) instant yeast
- 8 g (2 tsp) baking powder
- 7 g (2¾ tsp) xanthan gum
- 12 g (2 tsp) salt
- 120 g (½ cup) whole milk, lukewarm
- 2 US large/UK medium eggs, room temperature
- 50 g (3½ tbsp) sunflower oil
- 1 US large/UK medium egg, whisked
- 1-2 tbsp sesame seeds
Instructions
- In a bowl, combine the psyllium husk and 280g lukewarm water.
- Stir briefly and let sit for 30-45 seconds until a gel forms.
- In a large bowl or stand mixer, whisk together the tapioca starch, millet flour, sorghum flour, sugar, instant yeast, baking powder, xanthan gum, and salt.
- Add the 120g lukewarm milk, 2 room temperature eggs, and sunflower oil to the psyllium gel mixture.
- Mix the wet ingredients well to combine.
- Create a well in the center of the dry ingredients.
- Pour the psyllium gel-egg mixture into the well of dry ingredients.
- Knead the dough until it is smooth and all ingredients are evenly incorporated.
- Continue kneading for an additional 4-5 minutes if using a stand mixer, or 6-8 minutes if kneading by hand.
- Use a rubber spatula to scrape down the sides and bottom of the bowl occasionally during kneading.
- Turn the dough out onto a generously floured surface.
- Dust the top of the dough with flour.
- Gently knead the dough with floured hands and shape it into a ball.
- Divide the dough into 8 equal portions, each weighing about 130g.
- Working on a floured surface, shape each portion into a smooth ball.
- Arrange the shaped buns on a large lined baking sheet, ensuring they are spaced far apart.
- Lightly cover the buns with plastic wrap.
- Proof the buns in a warm spot for 1 hour 15 minutes to 1 hour 30 minutes, or until doubled in size.
- Adjust the oven rack to the middle position.
- Preheat the oven to 375ºF (190ºC).
- Once the buns have doubled in size, gently brush them with the whisked egg.
- Sprinkle the buns with sesame seeds.
- Bake for 14-15 minutes, or until deep golden brown on top.
- Immediately transfer the baked buns onto a wire rack to cool.
Notes
Ensure all ingredients are at room temperature for best results.
Do not add extra flour to the dough itself; it should be soft and sticky.
For a great rise, proof in a warm, draft-free spot.
Place the baking sheet directly on a preheated baking steel/stone for an airier crumb.


