
There’s just something magical about combining two of my favorite desserts into one, isn’t there? I remember the first time I whipped up these Chocolate Brownie Cheesecake Bars; it was for a potluck, and I wanted something that felt a little extra special but wasn’t too fussy. The oohs and aahs from my friends when they took their first bite? Totally made my day! These bars are truly a labor of love, and they always disappear so fast.
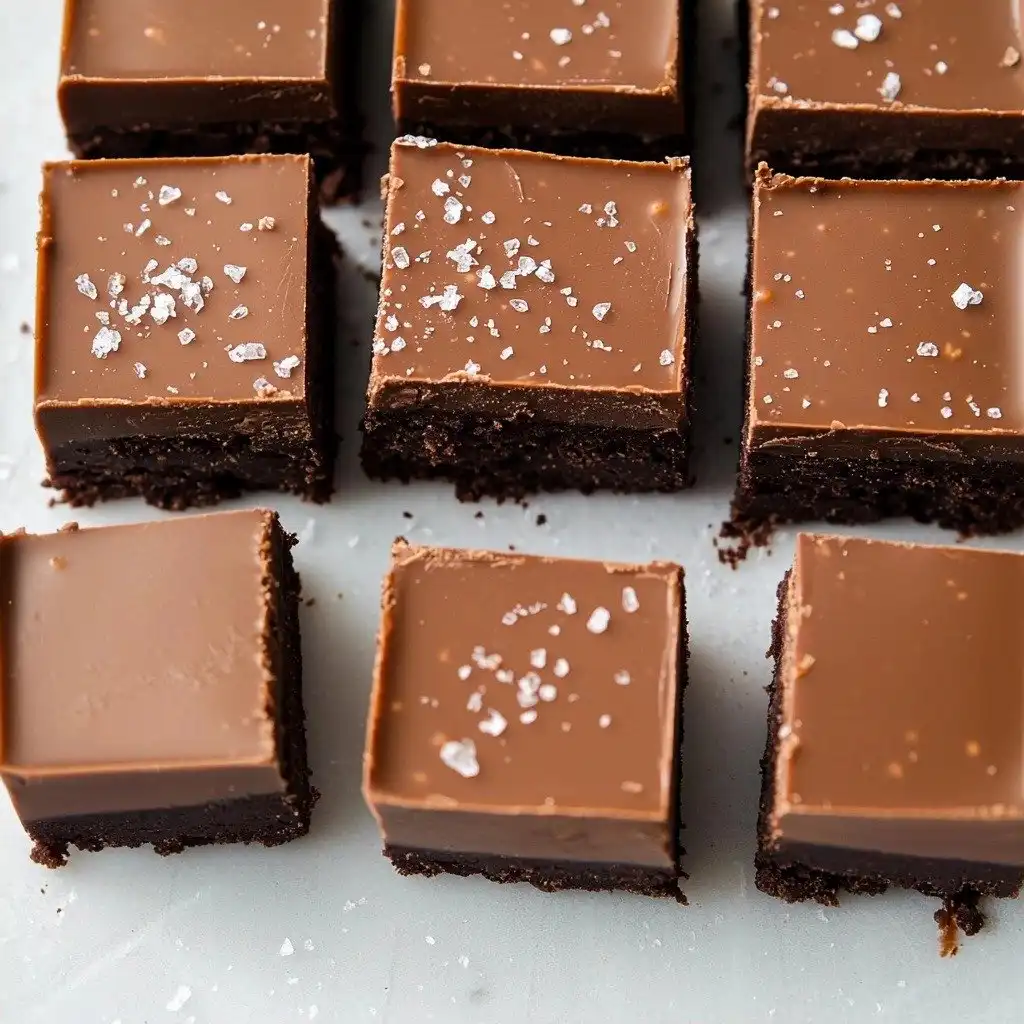
Why You’ll Love These Chocolate Brownie Cheesecake Bars
- They combine the rich, fudgy goodness of a brownie with a creamy, dreamy cheesecake swirl – it’s the best of both worlds!
- They look super impressive but are surprisingly easy to make, even for beginners.
- The deep chocolate flavor with that hint of coffee (if you add it!) is just divine.
- Perfect for any occasion, from a casual get-together to a fancy dessert spread.
Ingredients You’ll Need
- Unsweetened Chocolate Chips or Chopped Chocolate: This is the star of our brownie show! Use good quality chocolate for the best flavor. Dark chocolate works beautifully here.
- Coconut Oil: It adds richness and helps create that fudgy texture in the brownie layer. You can use refined coconut oil if you prefer no coconut flavor, or unrefined for a subtle hint.
- Smooth Almond Butter: This gives our brownie a lovely chewiness and depth of flavor. Make sure it’s smooth, not chunky, for the best consistency.
- Real Maple Syrup: Our natural sweetener for both layers. It adds a wonderful, subtle caramel note.
- Large Egg: Binds the brownie layer together. Make sure it’s at room temperature for better mixing.
- Blanched Almond Flour: This keeps our brownies gluten-friendly and gives them a tender crumb. Don’t substitute with other flours here.
- Cacao Powder: For an intense chocolate flavor in both layers. Cacao powder is less processed than cocoa powder and has a richer taste.
- Raw Cashews: These are the secret to our super creamy, dairy-free cheesecake layer! Soaking them is crucial for that silky smooth texture. Don’t use roasted cashews.
- Full Fat Coconut Milk: Another key to the cheesecake’s creaminess. Make sure it’s full-fat for the best results.
- Instant Coffee Granules: This is optional, but trust me, it really enhances the chocolate flavor without making it taste like coffee!
How to Make Chocolate Brownie Cheesecake Bars Step by Step
First things first, get those cashews soaking! Hot water for about 15 minutes is perfect, or you can do it overnight if you’re planning ahead. While they’re soaking, preheat your oven to 350°F and prepare your 8×8 pan. Lining it with parchment paper and creating a “sling” (leaving extra paper hanging over the sides) will make lifting the bars out a breeze later. Trust me, this little step saves so much hassle!
Now, let’s get started on that amazing brownie layer. Head to your stovetop and melt the chocolate, coconut oil, and almond butter together in a double boiler or a saucepan over low heat. Stir it gently until everything is perfectly combined and smooth. Take it off the heat, then stir in the maple syrup and vanilla. This is where the magic starts to happen! Make sure this mixture cools down a bit before you add the egg – we don’t want scrambled eggs in our brownies!
Once your chocolate mixture has cooled, stir in that egg. Then, gently fold in the almond flour and cacao powder until everything is smooth and well-mixed. Spoon this beautiful brownie batter into your prepared pan and smooth the top evenly. Pop it into the oven for about 15-17 minutes, just until it’s firm to the touch. Once baked, set it aside to cool completely while we make the cheesecake layer. Don’t worry if it doesn’t look super tall; it’s the perfect base!
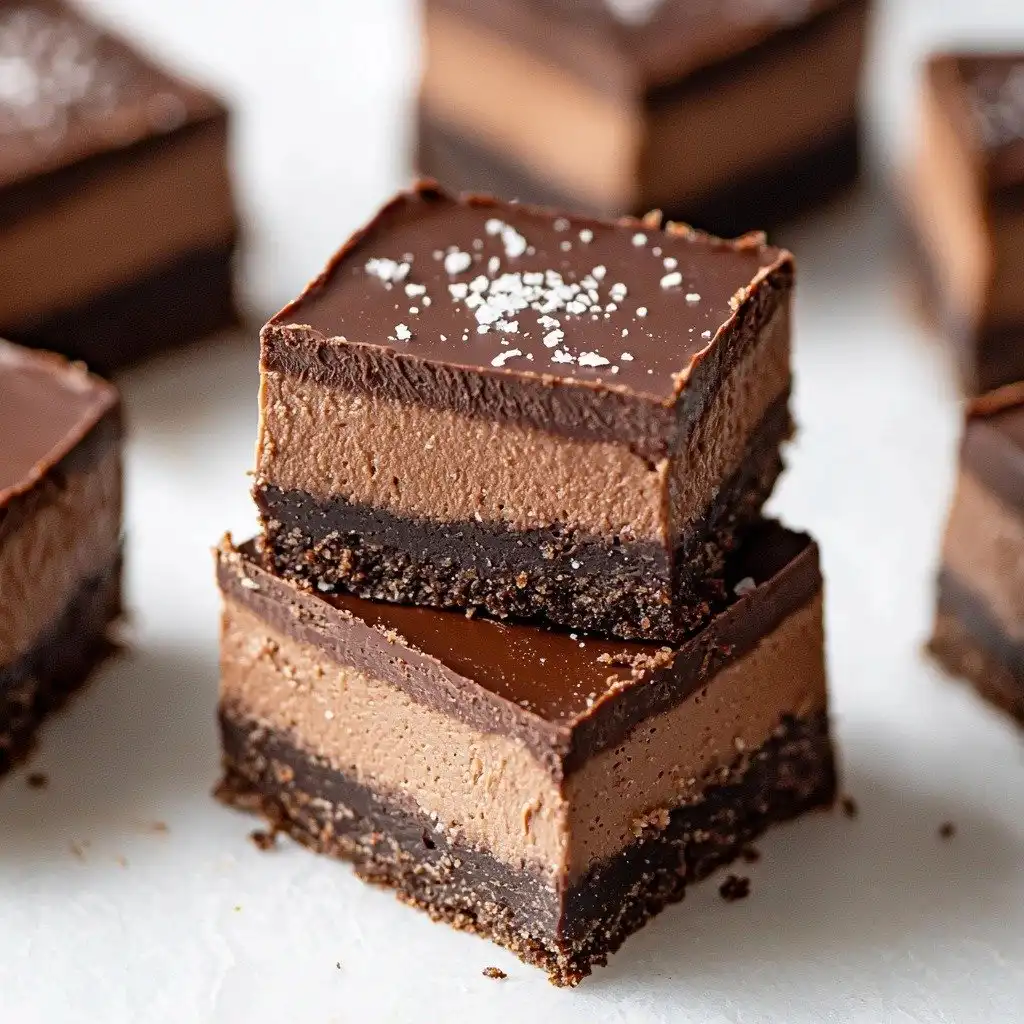
While the brownie cools, it’s cheesecake time! Grab your blender and add those soaked and drained cashews, cacao powder, coconut milk, melted coconut oil, vanilla extract, maple syrup, coffee granules (if you’re using them!), and sea salt. Blend, blend, blend! This part might take a few minutes, and you’ll want to stop and scrape down the sides of the blender a few times to make sure it gets absolutely silky smooth. Once it’s perfect, pour this creamy mixture over your cooled brownie layer, smooth the top, and then transfer it to the freezer. This is where patience is a virtue!
My Top Tips for Success
- I always make sure my cashews are thoroughly soaked and drained. This is key for that super smooth, creamy cheesecake texture.
- In my experience, letting the chocolate mixture cool before adding the egg prevents any accidental cooking of the egg.
- Trust me on this one: use a parchment paper sling in your baking pan. It makes removing the bars so incredibly easy!
- Don’t rush the freezing step. Those 2-3 hours are essential for the cheesecake layer to set up perfectly for clean cuts.
- A sprinkle of flaky sea salt on top before serving really enhances the chocolate flavor.
Common Mistakes to Avoid
- Not soaking cashews long enough: This will result in a grainy cheesecake layer. Soak them for at least 15 minutes in hot water, or even longer in cold water.
- Adding egg to hot chocolate mixture: The heat will cook the egg, leading to a lumpy brownie texture. Always let the chocolate mixture cool first.
- Overbaking the brownie layer: This can make your brownies dry. Bake just until firm, around 15-17 minutes. Remember, they’ll continue to set as they cool.
- Cutting bars before they’re fully firm: This will lead to messy, uneven squares. Be patient and let them freeze completely.
How to Store Chocolate Brownie Cheesecake Bars
- Freezer: Store in an airtight container for up to 3 months.
- Refrigerator: Store in an airtight container for up to 5 days.
Frequently Asked Questions
Can I make these dairy-free?
Yes, absolutely! This recipe is naturally dairy-free thanks to the coconut oil, almond butter, and cashew-based cheesecake layer. It’s perfect for those avoiding dairy.
Do I have to use instant coffee granules?
No, you don’t! The instant coffee granules are optional, but they really do enhance the chocolate flavor without adding a coffee taste. You can totally omit them if you prefer.
Can I use a different nut butter for the brownie layer?
While almond butter works best for texture and flavor, you could try a smooth cashew butter. Peanut butter might alter the flavor profile significantly, so I’d stick to almond or cashew.
How do I get clean cuts?
For super clean cuts, ensure the bars are fully frozen. Use a sharp knife and wipe it clean with a hot, damp cloth between each cut. This will help prevent sticking and smearing.
Why did my cheesecake layer turn out grainy?
A grainy cheesecake layer usually means your cashews weren’t blended enough or weren’t soaked sufficiently. Make sure to blend for several minutes, scraping down the sides, until completely smooth.
I hope these Chocolate Brownie Cheesecake Bars bring as much joy and deliciousness to your kitchen as they do to mine. They’re truly a showstopper that’s easier than it looks! Give them a try, and let me know how they turn out – I can’t wait to hear about your experience!
PrintChocolate Brownie Cheesecake Bars
Rich, fudgy brownie layer topped with a creamy, decadent cashew-based cheesecake swirl, frozen to perfection.
- Prep Time: 30
- Cook Time: 17
- Total Time: 227
- Yield: 16 servings
- Category: Dessert
- Method: Baking, Freezing
- Cuisine: American
- Diet: Vegetarian
Ingredients
- 1/2 cup unsweetened chocolate chips or chopped chocolate
- 2 tbsp Coconut Oil
- 1/2 cup smooth almond butter
- 2 tsp vanilla extract
- 1/4 cup real maple syrup
- 1 large egg
- 1/2 cup blanched almond flour
- 1/4 cup cacao powder
- 2 cups raw cashews (soaked in hot water for 15 minutes and drained)
- 1/4 cup cacao powder
- 1 cup full fat coconut milk
- 1 tbsp melted coconut oil
- 1/2 cup real maple syrup
- 1 tbsp instant coffee granules (optional)
- 1/4 tsp sea salt
Instructions
- Soak cashews in hot water for at least 15 minutes, then drain.
- Preheat the oven to 350 degrees F.
- Line an 8×8 pan with parchment paper, creating a sling.
- Melt chocolate, 2 tbsp coconut oil, and almond butter in a double boiler or saucepan on the stovetop.
- Stir until well combined and smooth.
- Remove from heat.
- Stir in 2 tsp vanilla extract and 1/4 cup maple syrup.
- Allow the mixture to cool completely.
- Once cooled, stir in the large egg.
- Fold in blanched almond flour and 1/4 cup cacao powder.
- Stir until the brownie batter is smooth.
- Spoon the brownie batter into the prepared pan.
- Smooth the top of the brownie layer evenly.
- Transfer the pan to the oven.
- Bake for 15-17 minutes, or until the brownie layer is firm.
- Add the drained cashews, 1/4 cup cacao powder, full fat coconut milk, 1 tbsp melted coconut oil, 1/2 cup maple syrup, 1 tbsp instant coffee granules (if using), and 1/4 tsp sea salt to a blender.
- Blend until completely smooth, scraping down the sides as needed. This may take several minutes.
- Pour the smooth cheesecake mixture on top of the cooled brownie layer.
- Smooth the top of the cheesecake layer.
- Place the pan in the freezer.
- Freeze until firm, which will take 2-3 hours.
- Remove from the freezer.
- Let sit for 15-20 minutes at room temperature.
- Cut into 16 even squares.
- Sprinkle with additional sea salt if desired before serving.
Notes
Ensure cashews are thoroughly soaked and blended for a creamy cheesecake.
Let the chocolate mixture cool before adding the egg to prevent scrambling.
Use a parchment paper sling for easy removal of the bars from the pan.
For clean cuts, allow the bars to freeze completely and wipe your knife between cuts.


