
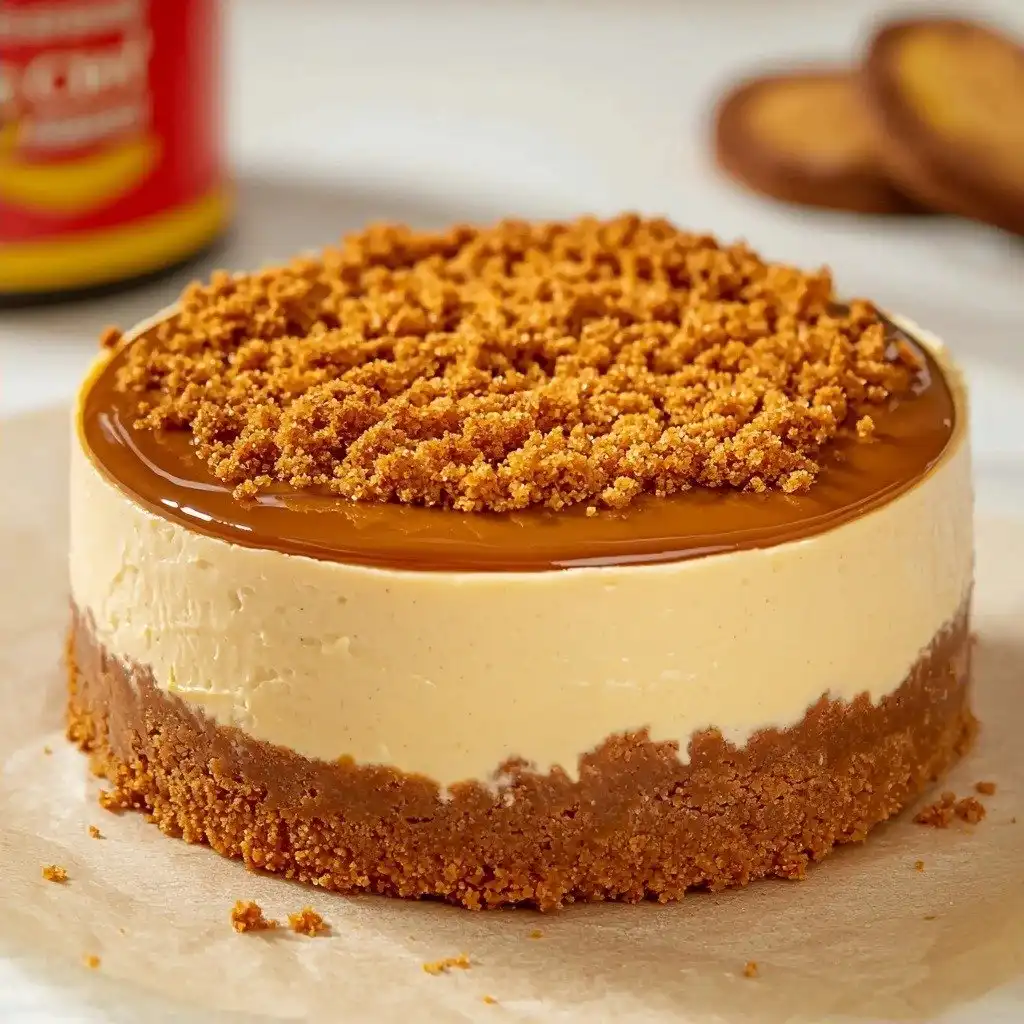
Oh, cheesecake! It’s one of those desserts that just feels special, right? For years, I thought making a truly delicious, show-stopping cheesecake was this super complicated, all-day affair. But then, a few years back, I stumbled upon a no-bake method, and it was a total game-changer. That’s when I started experimenting, and let me tell you, this Biscoff Cheesecake {5 Ingredients!} became an instant family favorite. It’s got that rich, creamy texture and that irresistible Biscoff flavor, all without turning on the oven!
Why You’ll Love This Biscoff Cheesecake {5 Ingredients!}
- It’s incredibly easy to make with just five simple ingredients.
- No baking required – perfect for hot days or when you just don’t want to heat up your kitchen.
- The creamy texture combined with the crunchy Biscoff base is pure heaven.
- It’s a fantastic make-ahead dessert, ideal for parties or a special treat.
Ingredients You’ll Need
- Biscoff biscuits: These are the star of our show! They make the most wonderfully spiced, crunchy base. Don’t substitute them if you want that authentic Biscoff flavor.
- Unsalted butter: This binds our biscuit base together. Unsalted is best so you can control the saltiness.
- Double cream (heavy whipping cream/thickened cream): This is crucial for that rich, thick, creamy cheesecake texture. Make sure it’s straight from the fridge and very cold for the best whipping results.
- Full-fat cream cheese: Go for the full-fat block cream cheese, not the spreadable kind in a tub. It gives the cheesecake its structure and classic tang.
- Biscoff spread: The second star of the show! This is what gives our cheesecake its signature, irresistible flavor.
How to Make Biscoff Cheesecake {5 Ingredients!} Step by Step
Let’s get started on this delicious journey! First things first, we’re going to tackle the base. You’ll want to crush your Biscoff biscuits really well – I like to put them in a zip-top bag and bash them with a rolling pin, or you can use a food processor for super fine crumbs. Then, just mix those crumbs with your melted butter until it all comes together like wet sand. Press this mixture firmly into the bottom of an 18cm (7″) springform pan. This is your foundation, so make it nice and even! Pop it in the fridge to chill while we move on.
Now for the creamy filling, this is where the magic happens! Grab a large bowl and pour in your cold double cream, cream cheese, and Biscoff spread. If you have an electric whisk, now is the time to use it – it makes this step so much easier. Whisk everything together until it’s really thick and creamy, almost like a scoopable ice cream. You’ll know it’s ready when it holds its shape. Don’t worry if it takes a few minutes, just keep whisking!
Time to assemble! Take your chilled biscuit base out of the fridge. Spoon your beautiful, thick cheesecake mixture over the base and gently smooth out the top with a spatula. Once it’s all neat and tidy, back into the fridge it goes for at least 3 hours. Honestly, overnight is even better if you can wait – it gives it the best texture and allows all those flavors to meld perfectly.
My Top Tips for Success
- I always make sure my cream is super cold before whisking; it helps it thicken much faster.
- Trust me on this one: use a springform pan! It makes removing the cheesecake so much easier.
- Don’t rush the chilling time. A well-chilled cheesecake is a firm, delicious cheesecake.
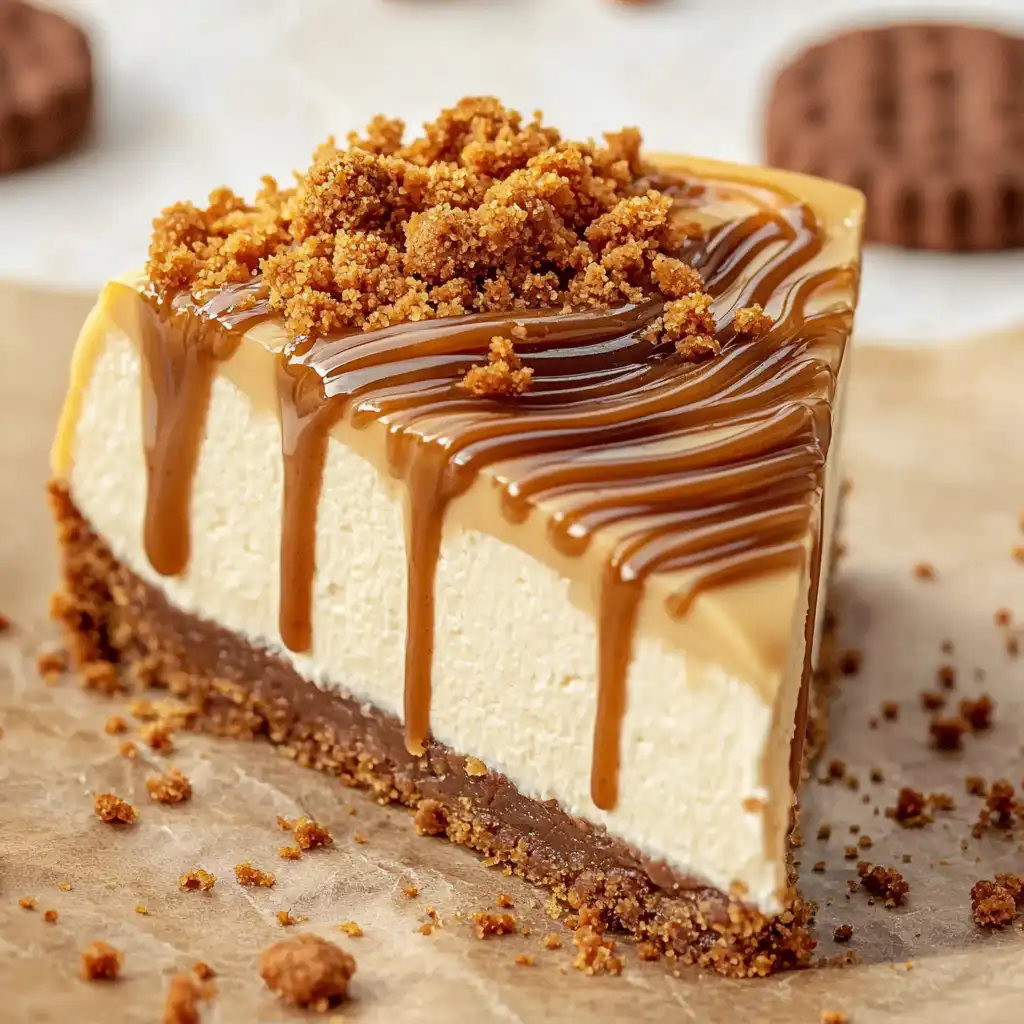
- For the topping, melt the Biscoff spread very gently. You want it pourable, not hot, to avoid melting the cheesecake mixture.
- When removing from the tin, running a warm knife around the edge really helps for a clean release.
Common Mistakes to Avoid
- Using low-fat cream cheese: This will result in a runny, less flavorful cheesecake. Always use full-fat block cream cheese.
- Over-melting the Biscoff topping: If the spread is too hot, it will melt into your cheesecake filling. Melt it gently until just pourable.
- Not chilling the cheesecake long enough: This is a no-bake recipe, so chilling is essential for it to set properly. Impatience will lead to a messy slice!
- Not crushing biscuits finely enough: Large chunks can make the base crumbly and difficult to cut. Aim for fine crumbs.
How to Store Biscoff Cheesecake {5 Ingredients!}
- In the fridge: Up to 3-4 days in an airtight container.
- Freezing: You can freeze slices for up to 1 month. Wrap individual slices tightly in plastic wrap, then foil, and thaw in the fridge before serving.
Frequently Asked Questions
Can I make this cheesecake ahead of time?
Absolutely! This Biscoff Cheesecake {5 Ingredients!} is perfect for making ahead. In fact, chilling it overnight gives it the best texture and allows the flavors to deepen.
What if I don’t have a springform pan?
While a springform pan is ideal, you can use a loose-bottomed tin. You might also line a regular cake tin with parchment paper, leaving an overhang to lift the cheesecake out.
Can I use different biscuits for the base?
You could, but then it wouldn’t be a Biscoff cheesecake! For this recipe, the Biscoff biscuits are key for that signature flavor profile.
How do I get clean slices?
For super clean slices, dip your knife in hot water and wipe it dry between each cut. This helps the knife glide through the cheesecake smoothly.
I really hope you give this amazing Biscoff Cheesecake {5 Ingredients!} a try! It’s such a simple recipe that delivers on big flavor and that perfect creamy texture every time. If you make it, please let me know how it turns out – I love hearing from you!
PrintBiscoff Cheesecake {5 Ingredients!}
An incredibly easy, no-bake Biscoff cheesecake made with just 5 ingredients, featuring a crunchy biscuit base and a smooth, creamy Biscoff filling.
- Prep Time: 20
- Total Time: 200
- Yield: 8 servings
- Category: Dessert
- Method: No-Bake
- Cuisine: American
- Diet: Vegetarian
Ingredients
- 200 g Biscoff biscuits Crushed
- 80 g Unsalted butter Melted
- 300 ml Double cream (heavy whipping cream/thickened cream)
- 400 g Full fat cream cheese
- 200 g Biscoff spread
- 150 g Biscoff spread Melted (for topping)
- 50 g Biscoff biscuits Crushed (for topping)
Instructions
- Combine the crushed Biscoff biscuits with the melted butter.
- Press the mixture firmly into an 18cm (7") springform pan or loose-bottomed tin.
- Chill the base in the fridge while you prepare the filling.
- Pour the cold double cream into a bowl.
- Add the full-fat cream cheese to the bowl.
- Add the 200g Biscoff spread to the bowl.
- Whisk all ingredients together until the mixture is very thick, almost like ice cream consistency. Use an electric whisk if available.
- Remove the chilled base from the fridge.
- Spoon the cheesecake mixture over the biscuit base, smoothing the top evenly.
- Pop the cheesecake into the fridge for at least 3 hours to set. For best results, chill overnight.
- Just before serving, gently melt the 150g Biscoff spread in a pan until pourable, being careful not to let it get hot.
- Crush the remaining 50g Biscoff biscuits finely for the topping.
- Remove the cheesecake from the fridge.
- While the cheesecake is still in the tin, pour the melted Biscoff spread over the top.
- Gently smooth the melted Biscoff spread with the back of a spoon until the top is completely covered, being careful not to touch the cheesecake mixture.
- Sprinkle the crushed biscuits around the edge of the cheesecake.
- Return the cheesecake to the fridge for at least a further hour to allow the topping to set, if time permits.
- To remove the cheesecake from the tin, run a warmed dinner knife around the outside, inside the tin.
- Sit the tin on a tall glass and carefully press down to release the sides.
- For clean slices, dip your knife in hot water and wipe it dry between each cut.
Notes
Ensure double cream and cream cheese are very cold for best results.
Do not overheat the Biscoff spread for the topping; it should be just warm enough to pour.
Chilling overnight yields the best set and flavor for the cheesecake.
Use full-fat block cream cheese, not spreadable cream cheese from a tub.


