
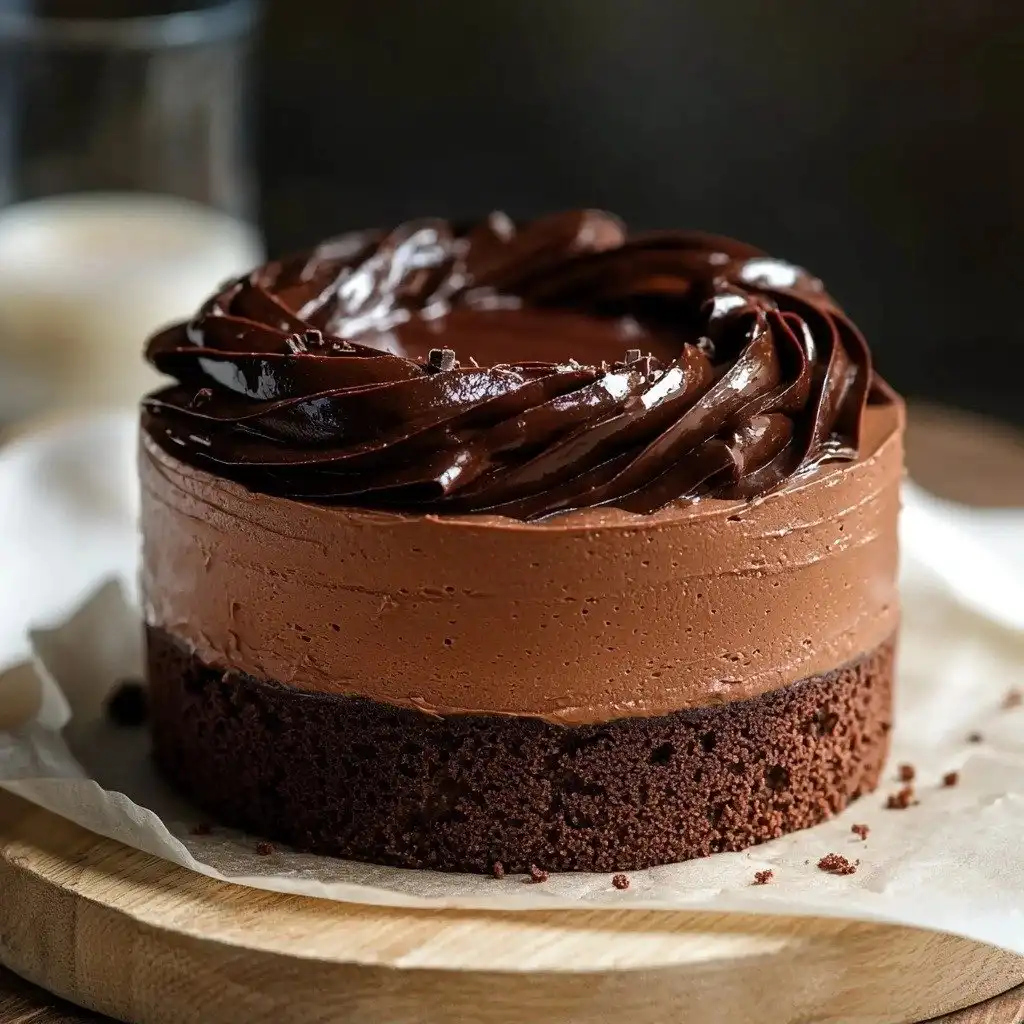
There’s just something magical about chocolate mousse, isn’t there? For years, I thought making a truly decadent, yet dairy-free and egg-free, version was impossible. Then, after many kitchen experiments, this recipe came into my life, and it’s been a game-changer. This Ridiculously Easy Vegan Chocolate Mousse Cake- No Nuts, No Tofu! is now my go-to for special occasions, or honestly, just when I need a serious chocolate fix. It’s rich, it’s creamy, and it tastes like a dream, without any fuss or complicated ingredients!
Why You’ll Love This Ridiculously Easy Vegan Chocolate Mousse Cake- No Nuts, No Tofu!
- It’s incredibly rich and chocolatey, satisfying even the deepest cravings.
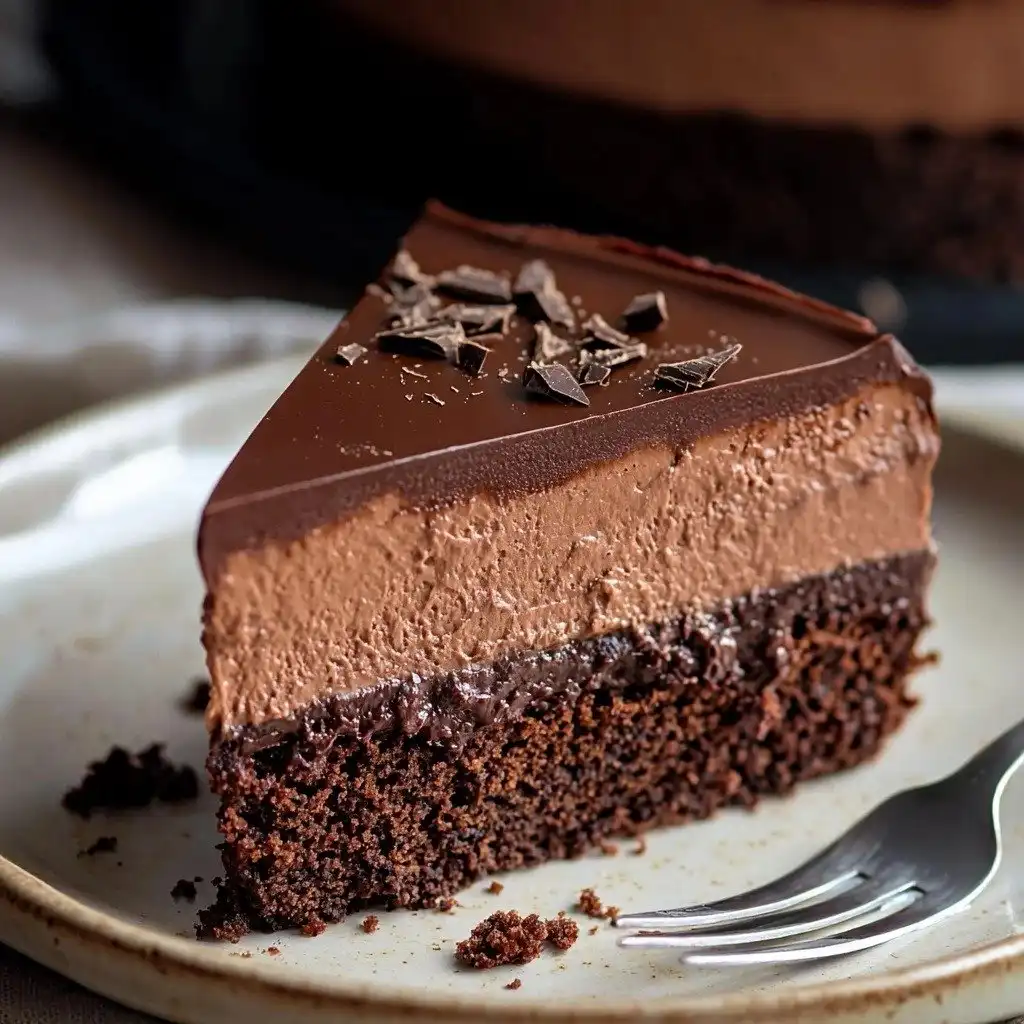
- The texture is out of this world – a moist cake base topped with airy, luscious mousse.
- You won’t believe how simple it is to make, even if you’re new to vegan baking.
- It’s completely free of nuts and tofu, making it a friendly choice for many dietary needs.
Ingredients You’ll Need
- All-purpose flour or gluten-free 1:1 baking flour: Sifting is key here for a light, airy cake. Don’t skip it!
- Dutch-process cocoa powder: This gives our cake that deep, dark chocolate color and rich flavor. Regular cocoa powder works too, but the color might be lighter.
- Vegan butter: Make sure it’s unsalted and melted, then cooled to room temperature. This helps keep the cake moist without making it dense.
- Dairy-free yogurt: This is a secret weapon for moisture and a tender crumb in vegan baking. Use a plain, unsweetened variety.
- Hot coffee: Don’t worry, your cake won’t taste like coffee! It intensifies the chocolate flavor beautifully.
- Vegan dairy-free chocolate: Use good quality chocolate chips or a chopped bar that you love the taste of, as it’s the star of the mousse.
- Heavy vegan cream: This is crucial for achieving that light, whipped mousse texture. Make sure it’s well chilled!
How to Make Ridiculously Easy Vegan Chocolate Mousse Cake- No Nuts, No Tofu! Step by Step
First things first, let’s get our cake pan ready and the oven preheating to 350°F (175°C). Line the bottom of your 9-inch springform pan with parchment paper and grease the sides. This ensures our beautiful cake will release easily later.
Now for the cake batter! In a medium bowl, whisk all your dry ingredients together – that’s the sifted flour, cocoa powder, baking powder, baking soda, and sea salt. In a separate, larger bowl, you’ll whisk together the dairy-free yogurt, cooled melted vegan butter, both sugars, and vanilla extract. Then, gently mix in the dry ingredients until just combined, pouring in the dairy-free milk as you go. Finally, pour in the hot coffee and whisk just until everything is incorporated. Don’t overmix!
Pour your batter into the prepared springform pan and bake for about 33-35 minutes. You’ll know it’s done when a toothpick inserted into the center comes out clean. Let the cake cool in the pan for 30 minutes, then carefully remove it. This is where the magic happens for an even cake: use a large knife to level off the top. Place it back in the springform pan and let it cool completely for 1-2 hours while you get ready for the mousse.
My Top Tips for Success
- I always make sure my vegan butter is melted and *cooled* for the cake. If it’s too hot, it can cook the other ingredients.
- Trust me on this one: chilling your bowl and whisk attachment for the mousse makes a huge difference in getting those stiff peaks!
- Don’t rush the cooling process for the cake. A fully cooled cake prevents the mousse from melting.
- When making the ganache, let the hot cream sit over the chocolate for a few minutes before whisking. It helps everything melt smoothly.
- For the best mousse texture, make sure your chocolate mixture is at room temperature before folding it into the whipped cream.
Common Mistakes to Avoid
- Overmixing the cake batter: This can lead to a tough, dry cake. Mix just until ingredients are combined.
- Not sifting the flour and cocoa powder: You might end up with lumps in your cake, affecting the texture.
- Not cooling the cake completely: If the cake is warm when you add the mousse, the mousse will melt and won’t set properly.
- Not chilling the bowl and whisk for the mousse: The heavy vegan cream won’t whip up to stiff peaks if it’s not very cold.
- Pouring hot ganache over the mousse: This will melt your beautiful mousse. Let the ganache cool to room temperature before pouring.
How to Store Ridiculously Easy Vegan Chocolate Mousse Cake- No Nuts, No Tofu!
- Refrigerator: Store any leftovers in an airtight container for up to 3-4 days.
- Freezer: For longer storage, place the cake (or individual slices) in an airtight container. It will keep well for up to 2 months.
Can I make this cake ahead of time?
Yes, absolutely! This cake is perfect for making a day in advance. The flavors often deepen, and the mousse sets beautifully overnight.
What if I don’t have a springform pan?
While a springform pan is ideal for easy release, you could try baking the cake in a regular 9-inch round cake pan lined with parchment paper that extends up the sides, creating “sling” handles to lift it out. However, releasing the mousse layer might be trickier.
Can I use regular cocoa powder instead of Dutch-process?
You can, but the cake’s color will be lighter, and the flavor might be slightly less intense. Dutch-process cocoa powder is less acidic, which affects how it reacts with baking soda, but for this recipe, it should still work fine.
My mousse isn’t getting stiff, what went wrong?
The most common reason is that your heavy vegan cream or your mixing bowl wasn’t cold enough. Make sure both are thoroughly chilled before whipping. Also, ensure your melted chocolate mixture has cooled to room temperature before combining it with the whipped cream.
Can I add other flavors to the mousse?
You can! A little peppermint extract for a mint chocolate mousse, or orange zest for a chocolate orange flavor, would be lovely. Add these in when you’re whisking the chocolate mixture.
I hope you give this Ridiculously Easy Vegan Chocolate Mousse Cake- No Nuts, No Tofu! a try! It’s truly a showstopper that’s surprisingly simple to create. When you make it, please come back and tell me how much you loved it!
PrintRidiculously Easy Vegan Chocolate Mousse Cake- No Nuts, No Tofu!
A rich, decadent, and surprisingly simple vegan chocolate mousse cake with a moist cake base and creamy, airy mousse, all without nuts or tofu.
- Prep Time: 45
- Cook Time: 35
- Total Time: 250
- Yield: 12 servings
- Category: Dessert
- Method: Baking, No-Bake
- Cuisine: American
- Diet: Vegan
Ingredients
- 2/3 cup (150 mL) dairy free milk, room temperature
- 1 1/2 cups (188 g) all purpose flour or gluten free 1:1 baking flour, sifted
- 1/2 cup (48 g) Dutch-process cocoa powder, sifted
- 1 tsp baking powder
- 3/4 tsp baking soda
- 1/4 tsp sea salt
- 1 cup (200 g) granulated sugar
- 1/4 cup (55 g) light brown sugar
- 1/4 cup (57 g) unsalted vegan butter*, melted and cooled to room temperature
- 1/2 cup (110 g) dairy free yogurt, room temperature
- 1/2 tsp vanilla extract
- 1/2 cup (120 mL) HOT coffee (can be brewed or instant)
- 1 cup (240 g) vegan dairy free chocolate
- 3 cups (720 mL) heavy vegan cream, divided and cold
- 1 batch vegan chocolate ganache
Instructions
- Preheat the oven to 350°F (175°C).
- Line the bottom of a 9-inch springform pan with parchment paper.
- Grease the edges of the springform pan with olive or cooking oil.
- Set the prepared pan aside.
- In a medium bowl, whisk together the sifted flour, sifted cocoa powder, baking powder, baking soda, and sea salt.
- Set the dry mixture aside.
- In a large bowl, whisk together the dairy-free yogurt, cooled melted vegan butter, light brown sugar, granulated sugar, and vanilla extract.
- Add the flour mixture to the wet mixture.
- Continue to whisk while you pour in the dairy-free milk.
- Once nearly combined, pour in the hot coffee.
- Whisk just until the hot coffee is incorporated into the cake batter.
- Pour the batter into the prepared springform pan.
- Bake for 33-35 minutes, or until a toothpick inserted into the center comes out clean.
- Remove the cake from the oven.
- Allow the cake to cool in the springform pan for 30 minutes.
- Transfer the cake out of the pan.
- Use a large kitchen knife to level off the top of the cake.
- Carefully place the cake back into the springform pan.
- While the cake is cooling, place a large bowl or stand mixer bowl into the freezer.
- Place the whisk attachment into the freezer as well.
- In a microwave-safe bowl or in a saucepan over medium-low heat, heat 1 cup (240 mL) of the heavy vegan cream until hot, about 100°F (38°C).
- Once hot, pour the hot cream over the vegan chocolate chips in a separate heat-safe bowl.
- Allow the mixture to sit for a few minutes to melt the chocolate, ensuring the chips are fully submerged.
- Whisk the mixture until the chocolate is completely melted into the heavy cream, forming a ganache-like consistency.
- Set the chocolate mixture aside to cool at room temperature.
- In the chilled bowl, add in the remaining heavy vegan cream.
- Begin to whip the heavy cream until you reach stiff peaks.
- Pour the cooled chocolate mixture into the whipped cream.
- Mix again on medium-high speed, scraping the bowl as needed, until fully combined and fluffy.
- Pour the mousse onto the cooled chocolate cake layer in the springform pan.
- Use an offset spatula to smooth the top of the mousse.
- Place the mousse cake into the fridge to chill for 3 hours, preferably overnight, with a piece of plastic wrap over it to prevent drying out.
- An hour before ready to serve, prepare the chocolate ganache topping by heating the vegan heavy cream again until hot.
- Pour the hot heavy cream over the chocolate chips in a heat-safe bowl.
- Let the chocolate sit for 2-3 minutes to melt fully submerged in the cream.
- Whisk until smooth.
- Set the ganache aside to cool for 30 minutes at room temperature.
- Once the ganache reaches room temperature, pour or spoon the ganache over the top of the set chocolate mousse.
- Place the chocolate mousse cake back into the fridge to set for 20-30 minutes before serving.
- Once the mousse cake is entirely set, use a butter knife to carefully run along the edges of the mousse cake walls and sides of the springform pan.
- Carefully release the springform cake walls.
- Plate the mousse cake.
- Decorate with berries and serve immediately.
- When not slicing, keep the mousse cake in the fridge or freezer.
Notes
Ensure all ingredients for the cake are at room temperature for best results.
Chill your mixing bowl and whisk thoroughly before whipping the vegan cream for the mousse.
Allow the melted chocolate mixture to cool completely before folding it into the whipped cream.
For the best texture and easy slicing, chill the cake overnight if possible.


