
Oh, these bars! There’s something so wonderfully nostalgic about fresh strawberries, and combining them with a buttery, oat-y crumble just feels like pure comfort. I first whipped up these Strawberry Oatmeal Crumble Bars on a whim one sunny afternoon, craving something sweet but not too heavy. The smell that filled my kitchen was absolutely divine, and the first bite? Pure bliss. They’ve been a firm family favorite ever since, perfect for a picnic, a potluck, or just a quiet afternoon treat with a cup of tea.
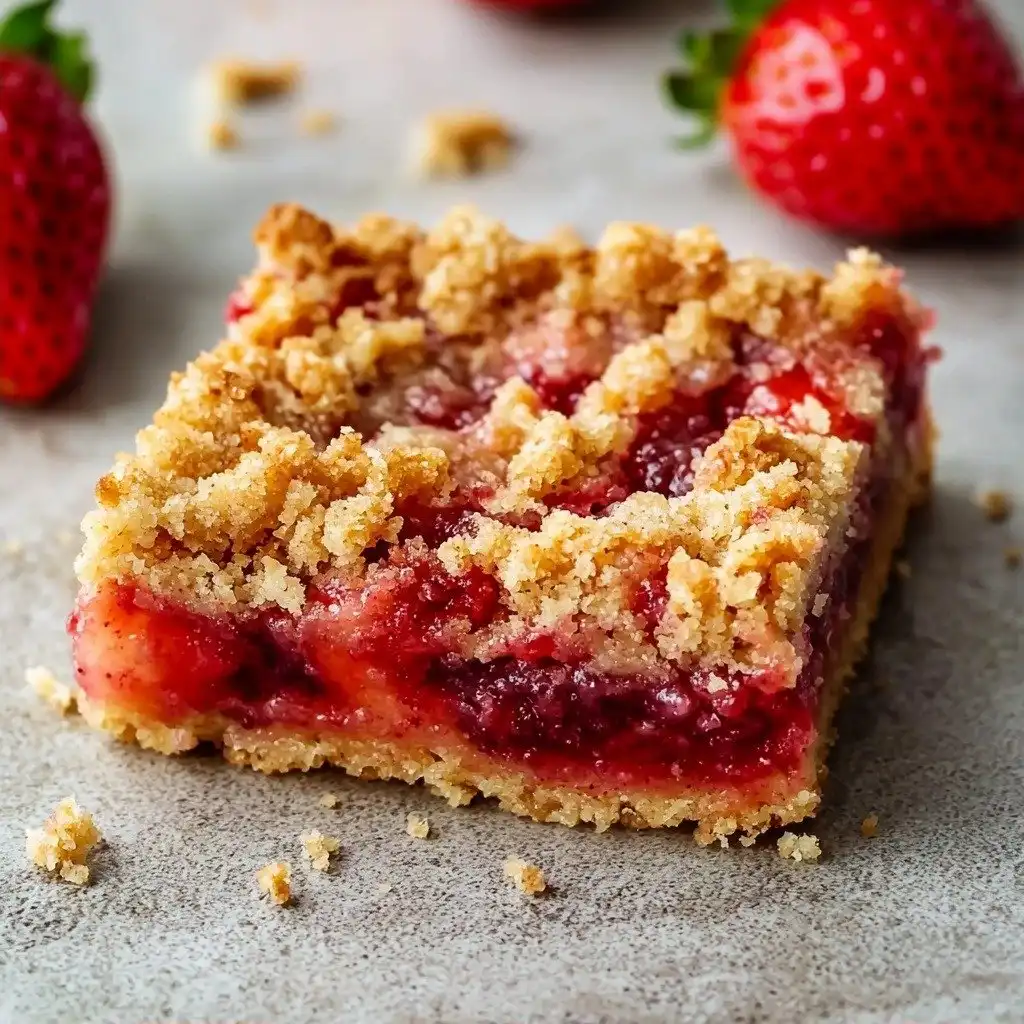
Why You’ll Love This Strawberry Oatmeal Crumble Bars
- They’re incredibly easy to make, even if you’re new to baking!
- That buttery oat crumble topping? It’s just irresistible, offering a lovely texture contrast.
- The fresh strawberry filling is bright, sweet, and perfectly balanced with a hint of lemon.
- They’re perfect for any occasion – from a casual dessert to a delightful breakfast on the go.
Ingredients You’ll Need
- Unsalted Butter: Melting the butter is key here for that perfect crumbly texture. Unsalted butter gives you control over the overall saltiness.
- All-Purpose Flour: This forms the base of our delicious crust and crumble. No need for anything fancy!
- Old-Fashioned Oats: These give our bars that wonderful chewiness and classic crumble bar texture. Quick oats can work in a pinch, but old-fashioned are best.
- Granulated Sugar: For sweetness in both the crumble and the strawberry layer.
- Light Brown Sugar: Adds a lovely depth of flavor and a little extra moisture to the crumble.
- Salt: A little salt really makes all the other flavors pop!
- Fresh Strawberries: The star of the show! Coarsely chopped ensures you get nice chunks of fruit in every bite.
- Lemon Juice: This brightens up the strawberries and keeps them from being too cloyingly sweet. Freshly squeezed is always best.
- Cornstarch: Our secret weapon for a perfectly set strawberry filling. It thickens the juices so your bars aren’t runny.
How to Make Strawberry Oatmeal Crumble Bars Step by Step
First things first, let’s get our oven ready! Preheat it to 350°F (175°C). While that’s warming up, grab an 8-inch square pan and line it with aluminum foil. This makes cleanup an absolute breeze, trust me! Give that foil a quick spray with cooking spray, and set it aside.
Now for the magical crumble! In a large, microwave-safe bowl, melt your unsalted butter. About a minute on high power should do it. Once melted, add in your all-purpose flour, old-fashioned oats, both sugars, and a pinch of salt. Stir it all together until it looks like a dry, sandy mixture with some lovely larger crumble pieces. This is where the magic happens! Scoop out about a heaping cup of this mixture and set it aside – that’s for our topping later. Press the remaining mixture firmly into the bottom of your prepared pan. Really pack it down to create a nice, even crust.
Next, let’s get those strawberries ready! In the same bowl you used for the crumble (less dishes, yay!), combine your coarsely chopped fresh strawberries, granulated sugar, fresh lemon juice, and cornstarch. Give it a good toss to make sure everything is coated. Don’t worry if all the sugar hasn’t dissolved yet; it will melt beautifully in the oven. Evenly spread this strawberry mixture over your pressed crust. Finally, take that reserved crumble topping mixture. Before sprinkling it over the strawberries, I like to gently squeeze handfuls of it in my palm to encourage those bigger, more satisfying crumble pieces to form. Sprinkle it evenly over the strawberries.
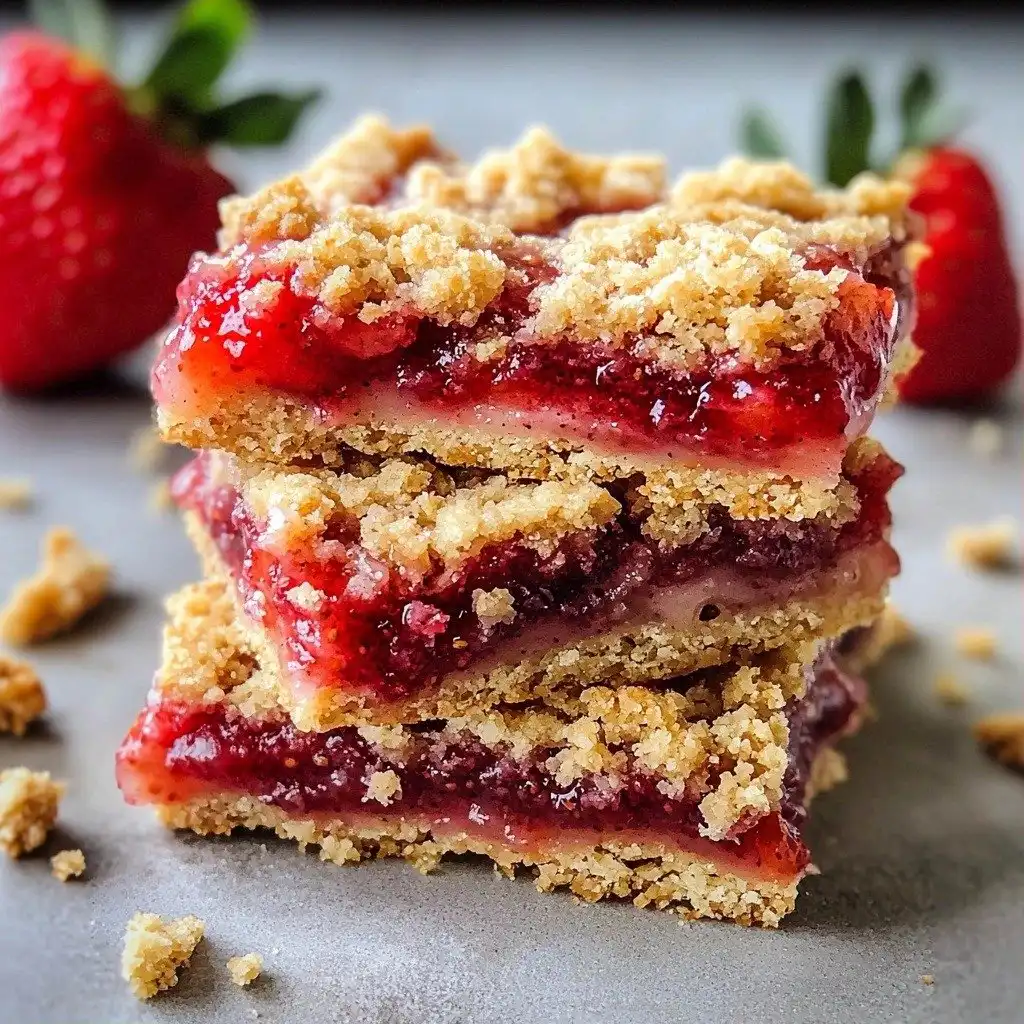
Pop your pan into the preheated oven and bake for about 50 minutes. You’re looking for the edges to be set, the center to be just set, and the crumble topping to be a very pale golden color. You’ll also see the strawberry filling bubbling happily around the edges. Keep an eye on them, especially if your strawberries are extra juicy – they might need a little longer. Once they’re done, the hardest part is waiting! Place the pan on a wire rack and let them cool for at least an hour before slicing. Seriously, resist the urge to cut into them early, or they’ll be a messy, delicious disaster!
My Top Tips for Success
- I always line my baking pan with foil and spray it – it makes lifting out the bars and cleanup so much easier. Trust me on this one!
- When pressing the crust, really pack it down. A firm crust holds everything together beautifully.
- Don’t skip the lemon juice in the strawberry layer; it brightens the flavor and balances the sweetness.
- In my experience, cooling the bars completely is non-negotiable. Warm bars will crumble and fall apart when you try to slice them.
- Watch for the bubbling edges of the strawberry filling as a key sign of doneness.
- If your strawberries are super ripe and juicy, they might need an extra 5-10 minutes in the oven.
Common Mistakes to Avoid
- Not packing the crust firmly enough: This can lead to a crumbly, unheld-together base. Make sure to press it down well with a spatula or your fingers.
- Cutting the bars too soon: The filling needs time to set as it cools. Cutting them warm will result in a messy, liquidy disaster.
- Over-baking the bars: While it’s good for the filling to bubble, baking for too long can dry out the crumble. Watch for pale golden edges and a set center.
- Skipping the cornstarch: Without cornstarch, your strawberry filling will be too runny and won’t hold its shape.
How to Store Strawberry Oatmeal Crumble Bars
- Room Temperature: Up to 2 days in an airtight container.
- Refrigerator: Up to 5 days in an airtight container.
- Freezer: Up to 3 months. Wrap individual bars tightly in plastic wrap, then place in a freezer-safe bag or container. Thaw at room temperature or in the refrigerator.
Frequently Asked Questions
Can I use frozen strawberries?
Yes, you can! Thaw them first and drain any excess liquid to prevent the bars from becoming too watery. You might need to add a little extra cornstarch if they seem very juicy.
Can I use a different fruit?
Absolutely! Blueberries, raspberries, or even chopped peaches would be delicious. Adjust sugar and cornstarch as needed based on the fruit’s sweetness and juiciness.
Why are my bars falling apart?
Most likely, they weren’t cooled completely before slicing. The filling needs time to set up as it cools. It could also be that the crust wasn’t packed firmly enough.
Do I have to use old-fashioned oats?
Old-fashioned oats give the best texture. Quick oats can be used, but the crumble might be a bit softer and less chewy. Steel-cut oats are not recommended for this recipe.
Can I make these bars gluten-free?
You can try substituting a 1:1 gluten-free all-purpose flour blend for the regular flour and ensure your oats are certified gluten-free. Results may vary slightly in texture.
I hope these Strawberry Oatmeal Crumble Bars bring as much joy to your kitchen as they do to mine. They’re such a simple, comforting treat that truly tastes like summer. If you make them, I’d love to hear how they turned out!
PrintStrawberry Oatmeal Crumble Bars
These easy-to-make bars feature a buttery oat crust, a sweet and tangy fresh strawberry filling, and a delightful crumbly topping.
- Prep Time: 20
- Cook Time: 50
- Total Time: 120
- Yield: 9 servings
- Category: Dessert
- Method: Baking
- Cuisine: American
- Diet: Vegetarian
Ingredients
- ½ cup unsalted butter melted
- 1 cup all-purpose flour
- ¾ cup old-fashioned oats
- ½ cup granulated sugar
- ¼ cup light brown sugar packed
- ½ teaspoon salt or to taste
- 2 cups coarsely chopped fresh strawberries
- ⅓ cup granulated sugar
- 2 tablespoons lemon juice
- 2 teaspoons cornstarch
Instructions
- Preheat your oven to 350°F (175°C).
- Line an 8-inch square baking pan with aluminum foil.
- Spray the foil lining with cooking spray.
- In a large, microwave-safe bowl, melt the unsalted butter for about 1 minute on high power.
- Add the all-purpose flour to the melted butter.
- Add the old-fashioned oats to the bowl.
- Add ½ cup granulated sugar to the bowl.
- Add the packed light brown sugar to the bowl.
- Add ½ teaspoon salt to the bowl.
- Stir all the ingredients together until well combined and the mixture is dry and sandy with some larger crumbles.
- Scoop out 1 heaping cup of this mixture and set it aside for the crumble topping.
- Transfer the remaining mixture to the prepared 8-inch square pan.
- Using a spatula or your fingers, hard-pack the mixture firmly to create an even, smooth, flat crust.
- Set the pan aside.
- In a large mixing bowl, add the coarsely chopped fresh strawberries.
- Add ⅓ cup granulated sugar to the strawberries.
- Add 2 tablespoons lemon juice to the strawberries.
- Add 2 teaspoons cornstarch to the strawberries.
- Toss all the strawberry layer ingredients together until combined.
- Take the reserved heaping 1 cup crumble topping mixture.
- Before sprinkling, gently squeeze the crumble mixture in your palm to encourage bigger crumble pieces to form.
- Evenly sprinkle the crumble topping mixture over the strawberry layer.
- Bake for about 50 minutes, or until the edges are set and the center has just set.
- The crumble topping should appear set and very pale golden.
- The strawberry filling mixture will be bubbling along the edges when done.
- If strawberries are very juicy, bars may take longer than 50-55 minutes; watch for doneness.
- Place the baked pan on a wire rack.
- Allow the bars to cool for at least 1 hour before slicing and serving.
- Do not slice before they have cooled completely to prevent messiness and falling apart.
Notes
Ensure bars cool completely before slicing for clean cuts.
Line the pan with foil for easy removal and cleanup.
Adjust baking time based on how juicy your strawberries are.
Press the crust firmly into the pan for a stable base.


